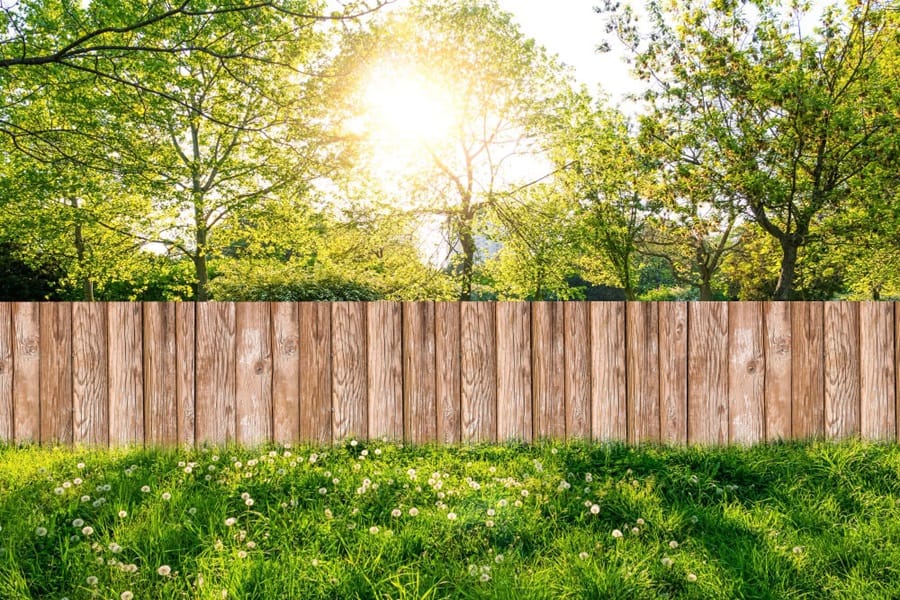
Building fence panels around your yard is a great way to not only increase your sense of solitude and privacy but also keep intruders at bay while keeping your kids and pets safe as they play. If that wasn’t enough to make you consider panel fence installation, then on top of all that, wooden fences can also add a lot of timeless beauty to your home, even increasing its market value. ‘How to put up fence panels’ can be a challenging project for most people, but it doesn’t have to be. This article details how to attach pre-made fence panels to post and how you can build fence panels in easy DIY steps.
Table of Contents
The tools and supplies you’ll need for building fence panels
- Circular saw
- Cordless drill
- Electric mitre saw
- Hammer
- Tape measure
- Speed Square
- Twine and stakes
- Bubble level or a laser level
- Post-hole digger
- Shovel
- Pencil
- Eye and hearing protection
- Work gloves
- Marking paint
- Materials
- 4 wood fence panels
- 5 four-by-four fence posts
- 10 bags of quick-setting concrete mix
- 5 bags all-purpose gravel
- #8 2 1/2 inch exterior screws
Is it easy to install a fence?
Building fence panels can be easy – however, this can also depend on your current fence’s condition and the general terrain in your garden. For instance, if you want to replace a fence on relatively flat ground where there’s a straight, clearly marked boundary, then you’re all set, the job likely won’t be complicated. On the other hand, if you have to define the boundary first or the project site allows you to install the fence on uneven ground only, then the task can get a bit challenging. Either way, we’ve got you covered with our ‘how to put up fence panels’ guide.
Check out our garden privacy ideas for some more inspiration.
Before beginning
The best time of the year for attaching fence panels to wooden posts is sometime early in the spring season or late in autumn. This allows any plants that get upset by the new ground structure enough time to recover and bounce back when summer arrives. Now, before you can start building fence panels, you must conduct a few important checks, such as:
- Mark your property lines to avoid building any fence panels on your neighbour’s property. You might want to check the exact boundary line as the current fence may not have been built along the same boundary lines as those in your property’s deeds.
- Always ensure that the fence is, in fact, yours before taking it down. If it’s your neighbour’s and they have reservations about you taking it down (perfectly normal!) you can build another fence alongside it, as long as it is built on your side of the boundary/property limits.
- Check with your local government or authority to see if the fence requires planning permission or a permit. In most cases, planning permission/permit is not required for a fence that’s under 2 meters tall. However, if your property’s boundary line meets either with a highway or the boundary/footpath of a highway, and you also want to erect a fence under 2m, then you will need planning permission.
Safety first!
Check the project site for any service cables before digging holes or using metal post supports. A CAT (cable avoidance tool) can be rented to detect any pipes/cables running below the project site. If the electrical cable installation was done professionally, it will typically indicate caution tape or an electrical route marked right above the hidden cable installation. Found cables but planning to run a fence over a solid surface such as a driveway or patio? That’s perfectly fine as long as you use fence post supports designed to integrate with the concrete/solid surface and bolted directly to the floor. You will then simply push the fence posts into the holders. Let’s say you discover cables under the project site that do not cover a solid floor or surface, then you may need to reconsider your fence-building plans. Additionally, here are some safety protocols you should follow during your panel fence installation:
- Undertake your DIY fencing project with the assistance of a friend, relative, or associate who is familiar with building fence panels.
- Always wear the necessary protective safety gear before starting.
- If cement is a part of the project materials, always wash your hands properly afterward as wet cement can leave burns on the skin.
- Never allow concrete to dry on any of your tools or equipment. Clean them off using a hard/stiff brush.
Now, let’s get to the individual steps:
How to put up fence panels: A step-by-step guide
Prepare the ground and fence posts
- Start by measuring out the length of your garden. This will tell you how many posts and panels you’re going to need. Always consider the posts’ width when making your calculations.
- Now, the posts need to be at least 2 feet taller than the panels as we want to build a solid foundation for our fence!
- Clear as much of the project site or proposed fence area as you can. After all, you’ll need a bit of room to work consistently.
- Before attaching fence panels to wooden posts, it’s always a good idea to dab the ends with some high-quality spirit-based timber preservative. This will ensure that they stay nice and robust while beneath the ground.
Measure out and dig your post holes
- Measure and then mark a 2-foot point on your post. This will be at ground level when you install the post into the ground so that we have the best anchorage possible.
- Dig a hole for every 2-foot deep post; this should be at least three times the width of the post.
- Now mark out 6-foot lengths along your fence line using string. This is important as it gives us an idea of the spacing needed and also helps erect our fence in a perfectly straight line.
Install the posts
- Place 3-4” of gravel at the base of each post hole which will act as a ballast for each respective pole. This will help with drainage and, thus, make the post last a lot longer.
- Go ahead and place the posts in the hole, supporting them with wooden stakes on either side to keep them upright as you prepare the cement. You’ll use your spirit level to ensure they are perfectly vertical.
- Now fill up the holes around the post with cement. Postconcrete works well for this particular application as it takes just a few minutes to dry and set. Just follow the instructions on the packaging and add some water. Make sure you wear goggles as you don’t want any dust going into your eyes!
- Use your trowel to create a mild slope in the drying cement. We want the water to run away from the post, and this is a necessary step. Now fill in the hole.
- Repeat these steps for every post, and once you get to the last one, remove the supports.
Take measurements for the panels & attach them to the posts
- Measure and then mark on the post where the panel clips need to go. Use galvanised screws to attach the clips at the top & bottom of each post.
- Now slide down the panels between the panel clips, securing them firmly in place with screws.
- Check to see if your panel is level. Ah, lovely!
Add some finishing touches
- We’re nearly there! Finish off the post by screwing a postcap on. The screw holes need to be pre-drilled though so that the wood doesn’t split.
- Treat your fence with a generous coating of high-quality wood preservative so that it remains nicely protected from the elements. It’s a good idea to conduct annual inspections and re-treat your fence to extend its life.
Building Fence Panels Done Right
Building fence panels and attaching fence panels to wooden posts can be fun if you know how to do it. No more Googling “how to attach pre-made fence panels to post” or “how to put up fence panels”. Just follow these easy-peasy instructions and you’re all set!
FAQs
Is it more cost-effective to build fence panels at home?
It can be, yes. As long as you have the right tools and materials, you can save a few costs here and there although it does depend on the type of wood you use or whether there are any labour costs involved.
What’s the best way of building fence panels?
Well, the most basic approach is to frame fence panels with wooden slates, then attach them to horizontal rails, and finally, secure them to fence posts. However, this may vary slightly based on the design and materials you choose.
Do I need to have gaps in my fence panels?
Yes, these are important as the small gaps allow for wood contraction and expansion with changing weather conditions, therefore, preventing warping and damage.
How can a true beginner build a fence?
Well, all it takes is the right planning and measuring, as well as setting posts correctly, attaching rails safely, and then securing the individual panels or pickets. However, it’s always best to refer to a step-by-step guide or at least consult an experienced builder.
Sources
Fallston Fence. (2019). The Top Benefits of Building a Fence On Your Property. [online] Available at: https://fallstonfence.com/good-fences-make-good-neighbors-the-top-benefits-of-building-a-fence-on-your-property/ [Accessed 27 Dec. 2023].
Ryan Jenkins is a professional gardener and has been working in the gardening industry for over 25 years. This has allowed Ryan to accumulate a vast wealth of gardening knowledge which he shares on the Sefton Meadows blog.